skip to main |
skip to sidebar
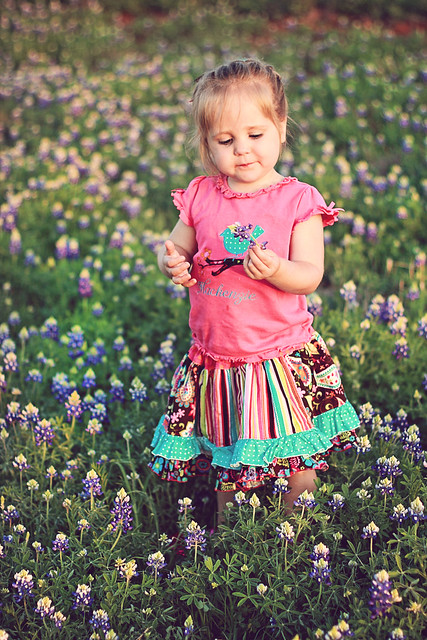
So... I had a sweet client-mama-friend of mine message me this morning on Facebook to tell me that she took her daughter and son out to take pictures in the Bluebonnets last night! For those of you not from Texas... Bluebonnets are these beautiful blue/purple flowers that spring up every spring... and they just so happen to be the Texas state flower! The very popular thing to do is to go take pictures amongst them... which I'm planning to do myself next week with my babies (stay tuned.. have some very special Pinteresty fun planned there!). Well, my sweet client was messaging me to tell me (in her words) that it takes more than just a nice camera to get great pictures!! I could totally relate to this just on the mama-front because I think it's just tough to take pictures of our own children!! I lamented with her a bit, admiring her for even trying..... and went on with my day! WELL... a bit later she posted the photos she took and I immediately got excited!! It was obvious to me that she was shooting with a DSLR, not a point and shoot, and I knew right away which lens she was using. The first thing I noticed was the beautiful "bokeh" in the image... or the pretty creative blurr you see in the back ground. The second thing I was excited about was the fact that she went just before sunset when the light is just gorgeous. Her little girly was apparently not excited about cheesing for the camera.. but I just loved this image because it just felt so natural and unposed!! These are always my favorites in the sessions I shoot anyway! But, I did notice a few things that could be tweaked (and only a pro would even notice these). It was a lovely snap straight out of camera on an automatic setting... but I asked her to send me a few of her faves so I could play around with them a bit. I've had quite a few people ask me lately about my post processing and how I go about it. From time to time I've had client's ask me if I can spruce up an image for them and I don't hesitate! Anyway... here was the process for this image:
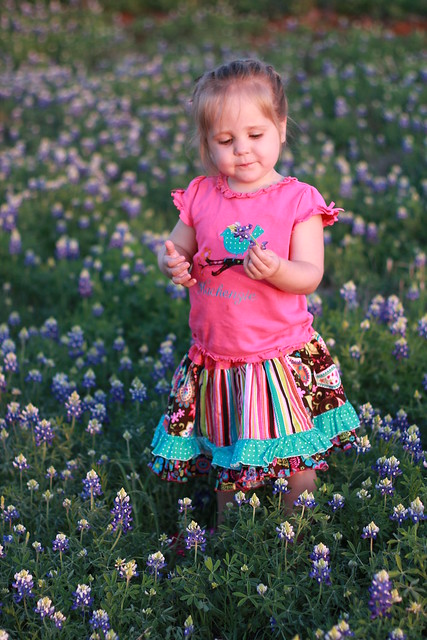 The straight out of camera image above(sooc)... very sweet image, beautiful bokeh, shot on a Canon t2i with the 50mm f1.4 lens in auto-portrait mode. The first thing I see is that the white balance is a tad on the magenta side. This is because the sun was setting (or had set) and the sky was reflecting a very pink light onto her skin. When I'm editing an image, my main concern is the subject's skin tones... is the exposure nice and bright? Are the colors correct or do they need adjusting? In this image I thought her skin tones could be warmed up a bit to reflect her true skin tones. Which brings us to the next version of this image....
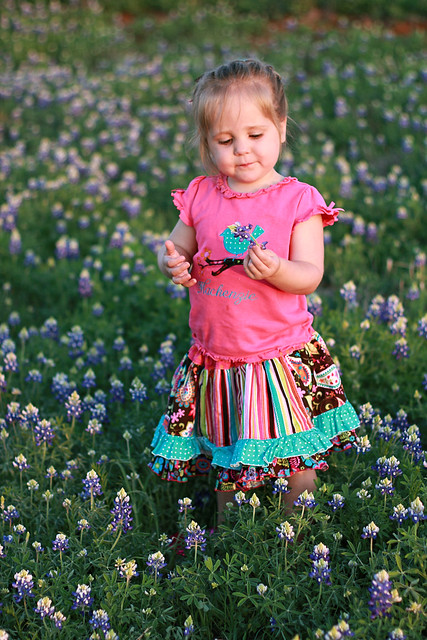 So, here (above) I did a basic color balance and reduced the magenta values and brought in a bit of yellow and red so that her skin tones looked correct to me. Since I adjusted the whole image, it also corrected the color cast on the foliage. I liked the result and it achieved the goal I was trying to accomplish!
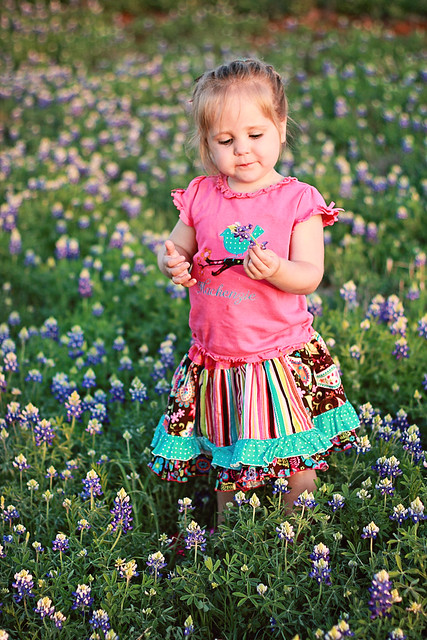 The next thing I did was run a color process action (actions are a fancy term for a sequence of editing steps that are pre-made and make life easier for a photographer, you can buy them, or create them yourself!). This action sharpened, brightened, and increased the saturation a bit. When I did this, I noticed that under her chin, under her arm, and in the creases of her eyes she had a bit of a orangy/red color cast from her pink shirt. This can happen very easily when you are dealing with vivid colors in clothing, the reflection of the green grass, or any strong color that might be reflecting it's colors onto the skin. So, I ran an action that by using the brush tool, removes individual colors wherever you want it to.
 Once I was done with that stage..... I just felt like this pic would look great with a vintage haze... so I ran my favorite vintage action and voila! The finished product!
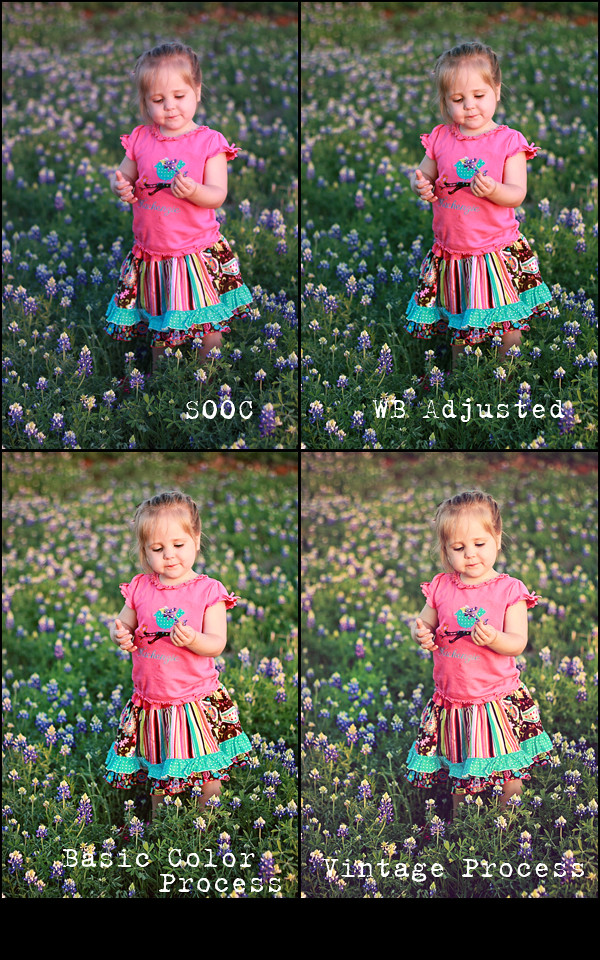 Here is a side by side comparison of all 4! :)
Now, there will be someone out there that says... "I liked the first image better?!" ... and of course, to each his/her own! There are no absolutes (ok, well maybe there are some) but post processing is a matter of taste and we all see differently. This was my take on this particular image! I was so impressed with her picture from the get-go... by far the best mommy-shot image of her kiddos in the famed Bluebonnets I've ever seen! :)
Here is a side by side comparison of all 4! :)
Now, there will be someone out there that says... "I liked the first image better?!" ... and of course, to each his/her own! There are no absolutes (ok, well maybe there are some) but post processing is a matter of taste and we all see differently. This was my take on this particular image! I was so impressed with her picture from the get-go... by far the best mommy-shot image of her kiddos in the famed Bluebonnets I've ever seen! :)

Blog Designed by Rita of CoffeeShop, 7/09